

Table of contents
I started a small personal project. I wanted to start experimenting with containers and server clusters. The objective is to set up all my development servers on this cluster allowing me to jump from computer to computer without issue. The cluster will also integrate a NAS with 4 SSDs both to store images for the cluster and give me a local NAS to store data without using OneDrive or similar services.
Why Raspberry Pis?
So first of all why use a raspberry pi, the main reason is the price, to be honest. When I started checking my option, I arrive at 3 possible solutions.
A virtual machine in my main computer
Cloud services
A dedicated server locally
I discarded the virtual machine because it will require my desktop computer to be powered on all the time. It will be a solution to start but I want something that I can keep running to set things like webserver etc.
Personally, the initial cost wasn't a big issue but I wanted to avoid maintenance costs as much as possible. After all, this will be running 24/7 for a long time. A cloud service will mean a recurring cost and that's a deal breaker in this case.
So that only leaves me with the local server option. So after checking the options I realize that I had four old raspberry pi 3s laying around my house that I wasn't using. I also had a raspberry pi 4 with four SSDs from an older project, and I decided to use it as network storage for the system.
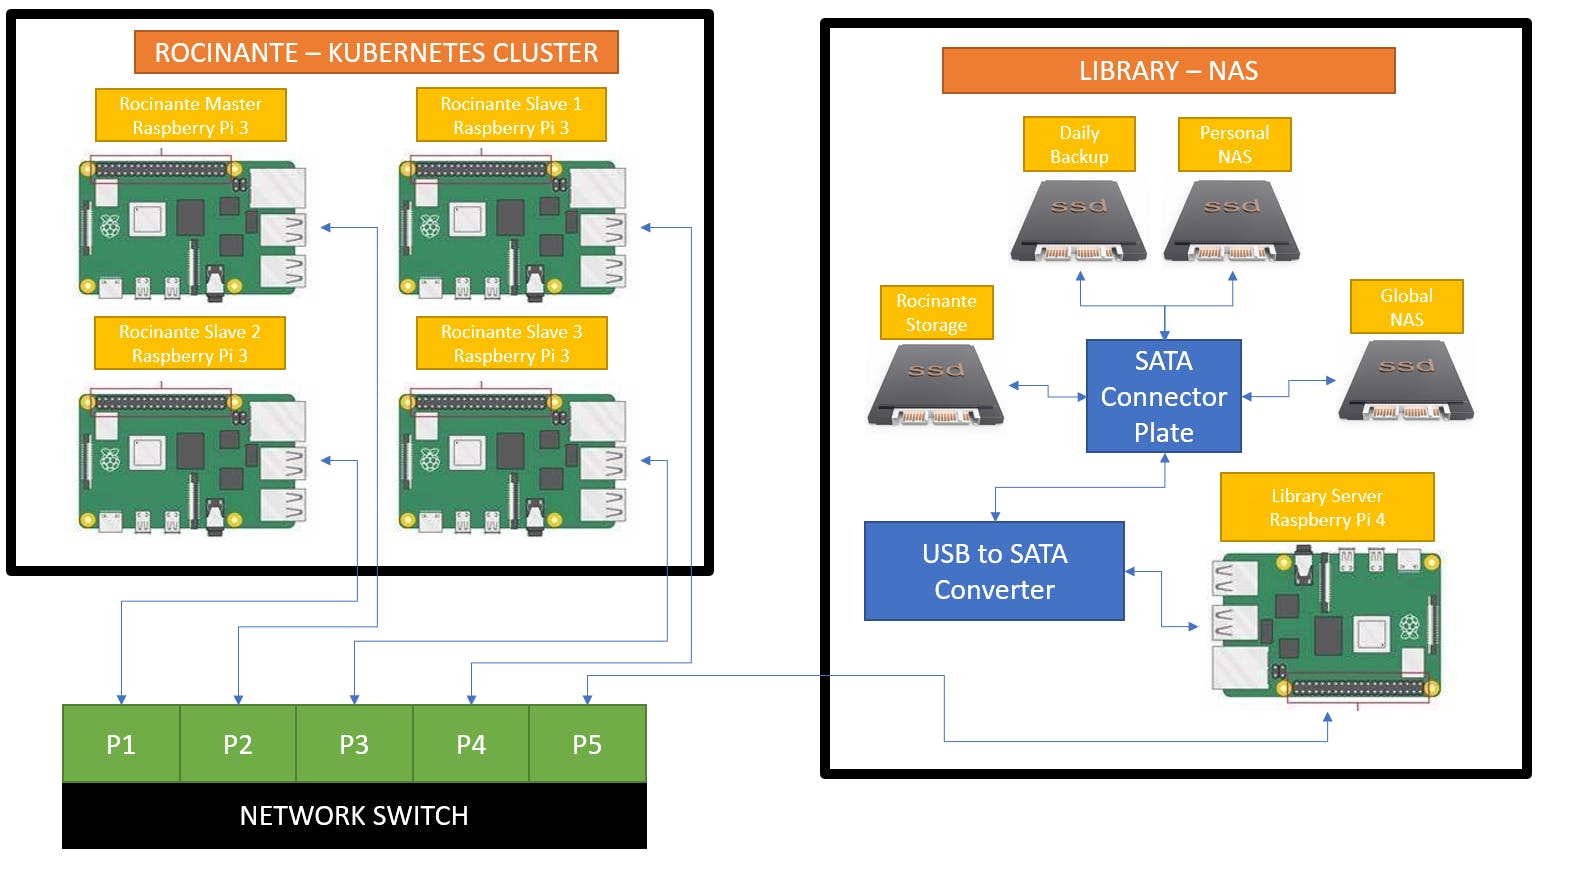
System diagram
The system overview will be like this:
Materials
To set up the system this will be the required materials:
Rocinante
4 Raspberry Pi 3s
4 32Gb micro SD cards
Library
4 512 Gb SSDs
Raspberry Pi 4
Quad SATA HAT
12V power supply
5-port ethernet switch
5V DC power supply
Cables for power and network
Old computer case
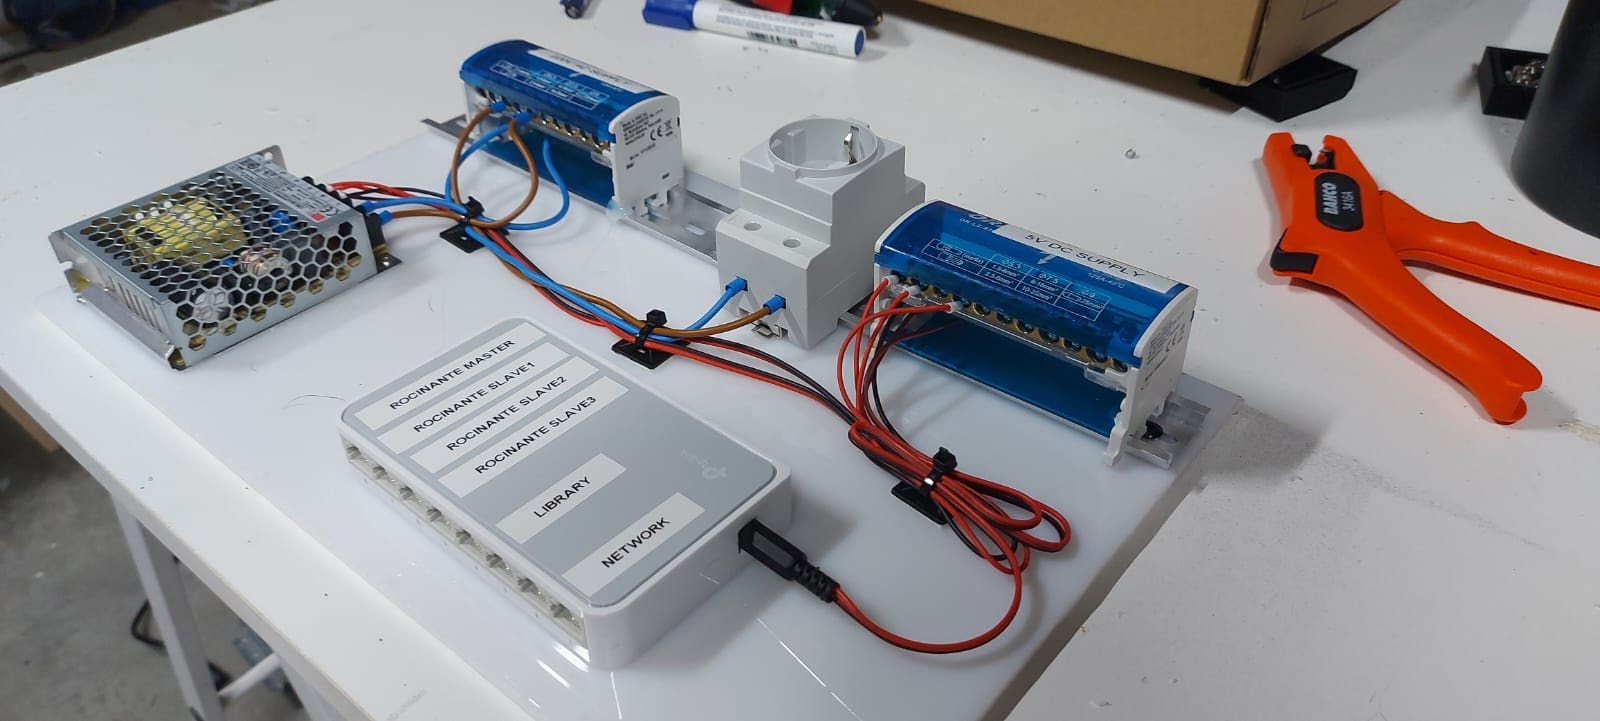
Build
First of all, I remove all useless bays from the case, the layout is pretty simple both servers go glued to the button of the case. I will put a panel where the motherboard sits usually. That panel will have all the power distribution necessary and the network switch.
Lastly, I set an in-line ethernet connector and a power supply connector in the exterior of the case, so I can connect it more easily. This is the final product.
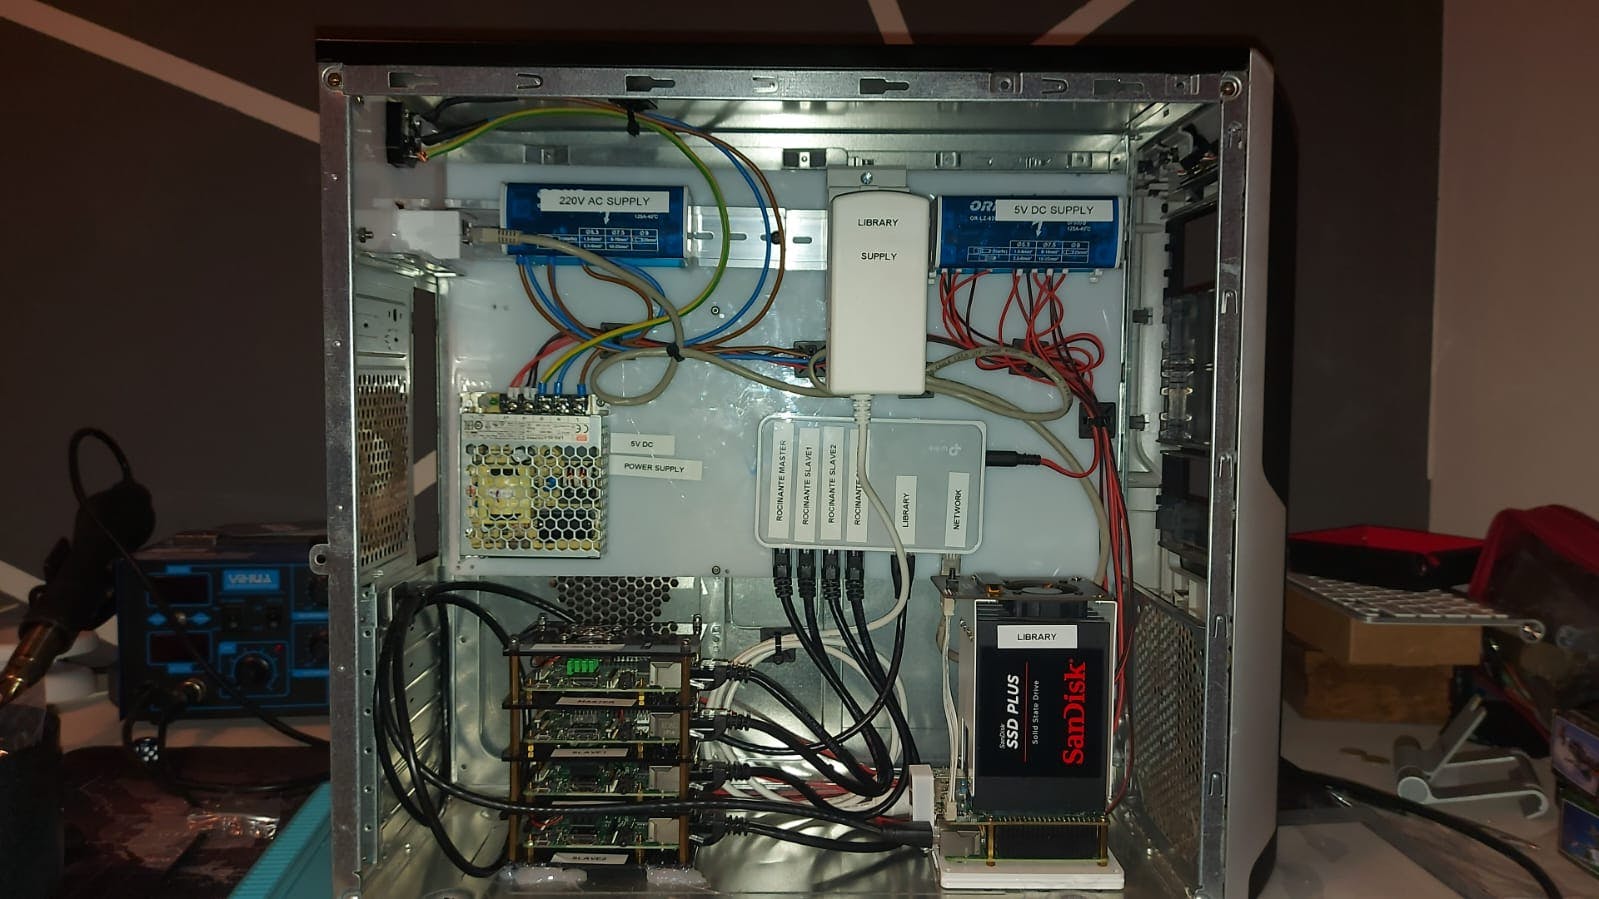
Now everything is ready to start configuring the system.